Connect a source
Bring in documents from the systems they already live in, or by uploading them directly.
Connect CampusMind to where your documents already live, so remediation can work your real backlog instead of one-off uploads.
Sources
| Source | What it pulls from |
|---|---|
| Canvas | Courses in your connected instance. |
| Blackboard | Content areas in your connected instance. |
| Brightspace | Courses in your connected instance. |
| SharePoint | Document libraries you grant access to. |
| Manual | PDFs you drag in yourself, when you don't need an integration. |
Every document records the source it came from, and connected sources can write the corrected file back — see Replace original file below.
Who sets a source up
Getting a source working takes two things, and only the second one happens in the product.
| Stage | Who does it | What it involves |
|---|---|---|
| Onboarding | CampusMind's developers, with your technical team | Registering CampusMind with your Canvas, Blackboard, Brightspace or SharePoint environment and arranging the API access it needs. Done once, before anyone signs in. |
| Connecting | Each person who runs a course | Entering your system's URL and signing in to authorize CampusMind for your own account. Takes a minute, from the screen where you pick a course. |
There is no source configuration for you to fill in
Nobody on your team enters API credentials or secrets in CampusMind — not a User, not an Admin. If a source can't be reached at all, that's an onboarding matter for Support, not a setting to change.
Start a run from a source
From the Document Accessibility Hub, choose Make Course Accessible. The picker lists the four integrations with a connection badge on each.
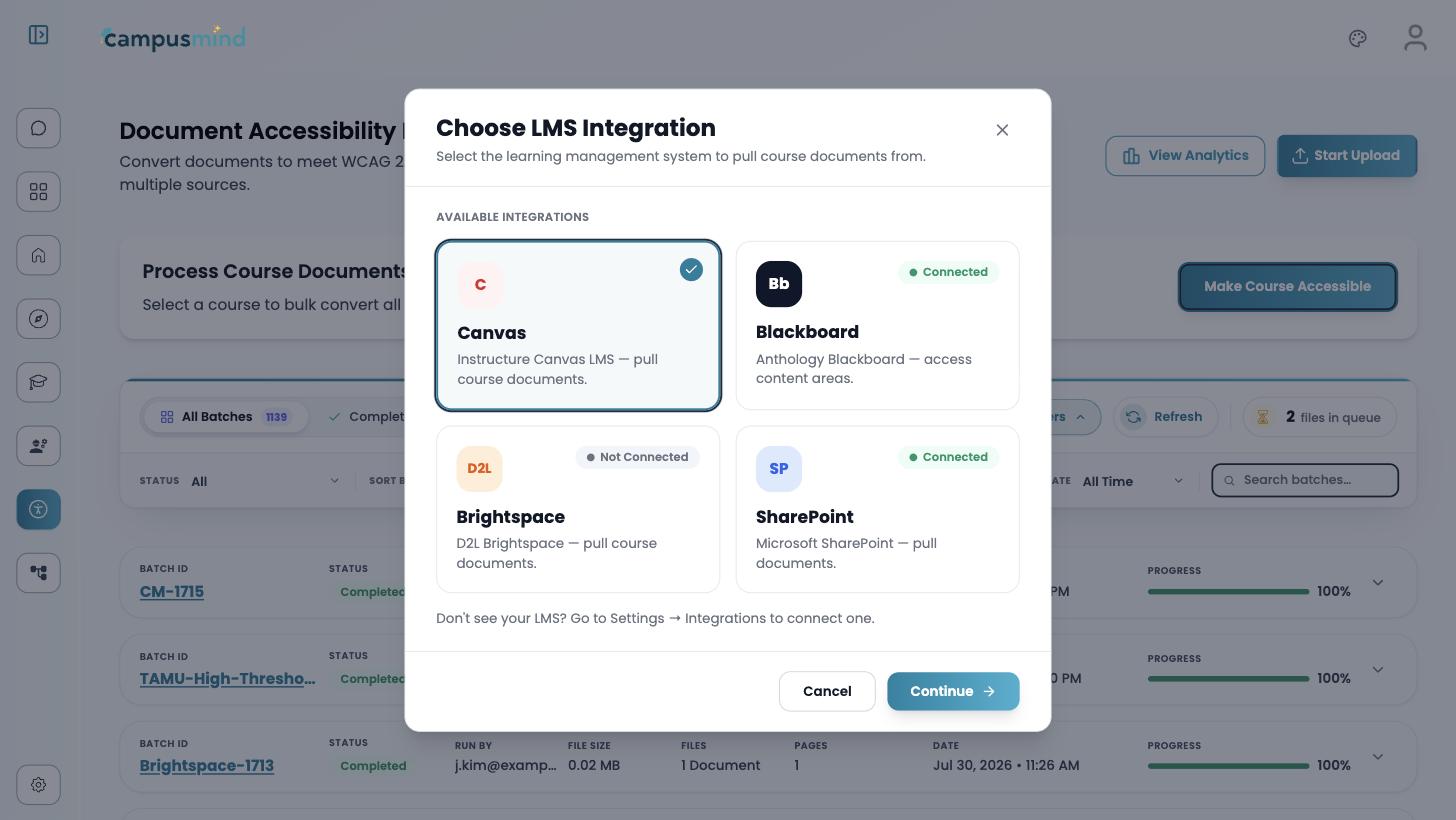
Canvas, Blackboard and Brightspace land on Select a Course to Convert. SharePoint asks for a Site and then a Library instead.
Connect your account
The badge in the top right of the selection screen tells you where you stand. If it reads Not connected, open the gear icon on the right of the page heading and give the dialog your institution's URL for that system.
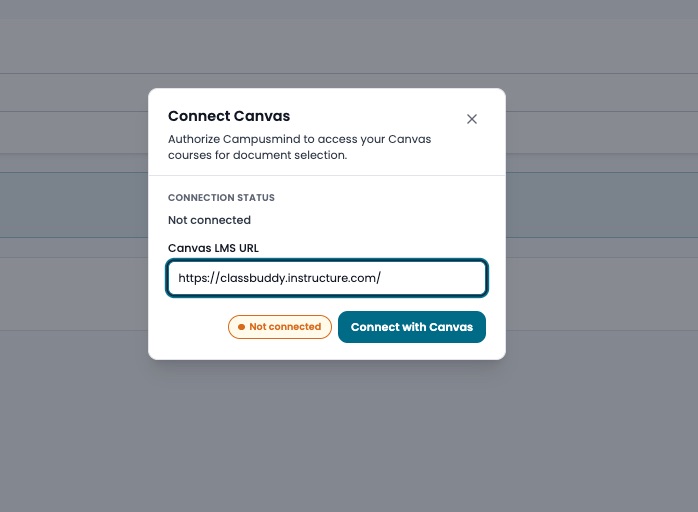
Choose Connect with Canvas — or the equivalent for your source — to hand off to the sign-in page.
Sign in and authorize
Your LMS asks you to sign in, if you aren't already, and then to let CampusMind act for your account. SharePoint routes through Microsoft in the same way.
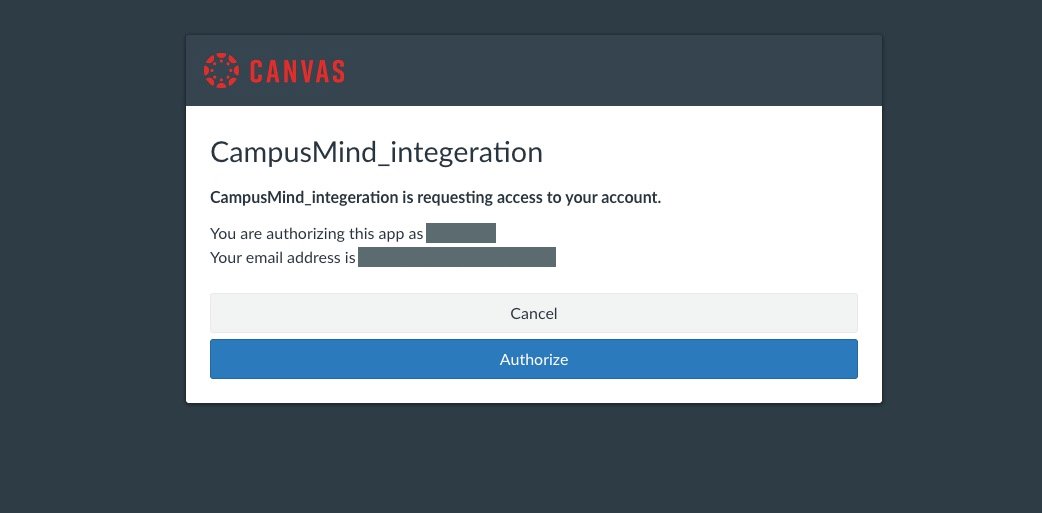
The authorization belongs to your account, not the institution's, so a colleague opening the same screen may still see Not connected until they do this themselves.
Pick the documents
Once you're connected, the course dropdown fills in. Selecting a course lists every PDF it holds, with each file's size, pages, status, and a link to the original.
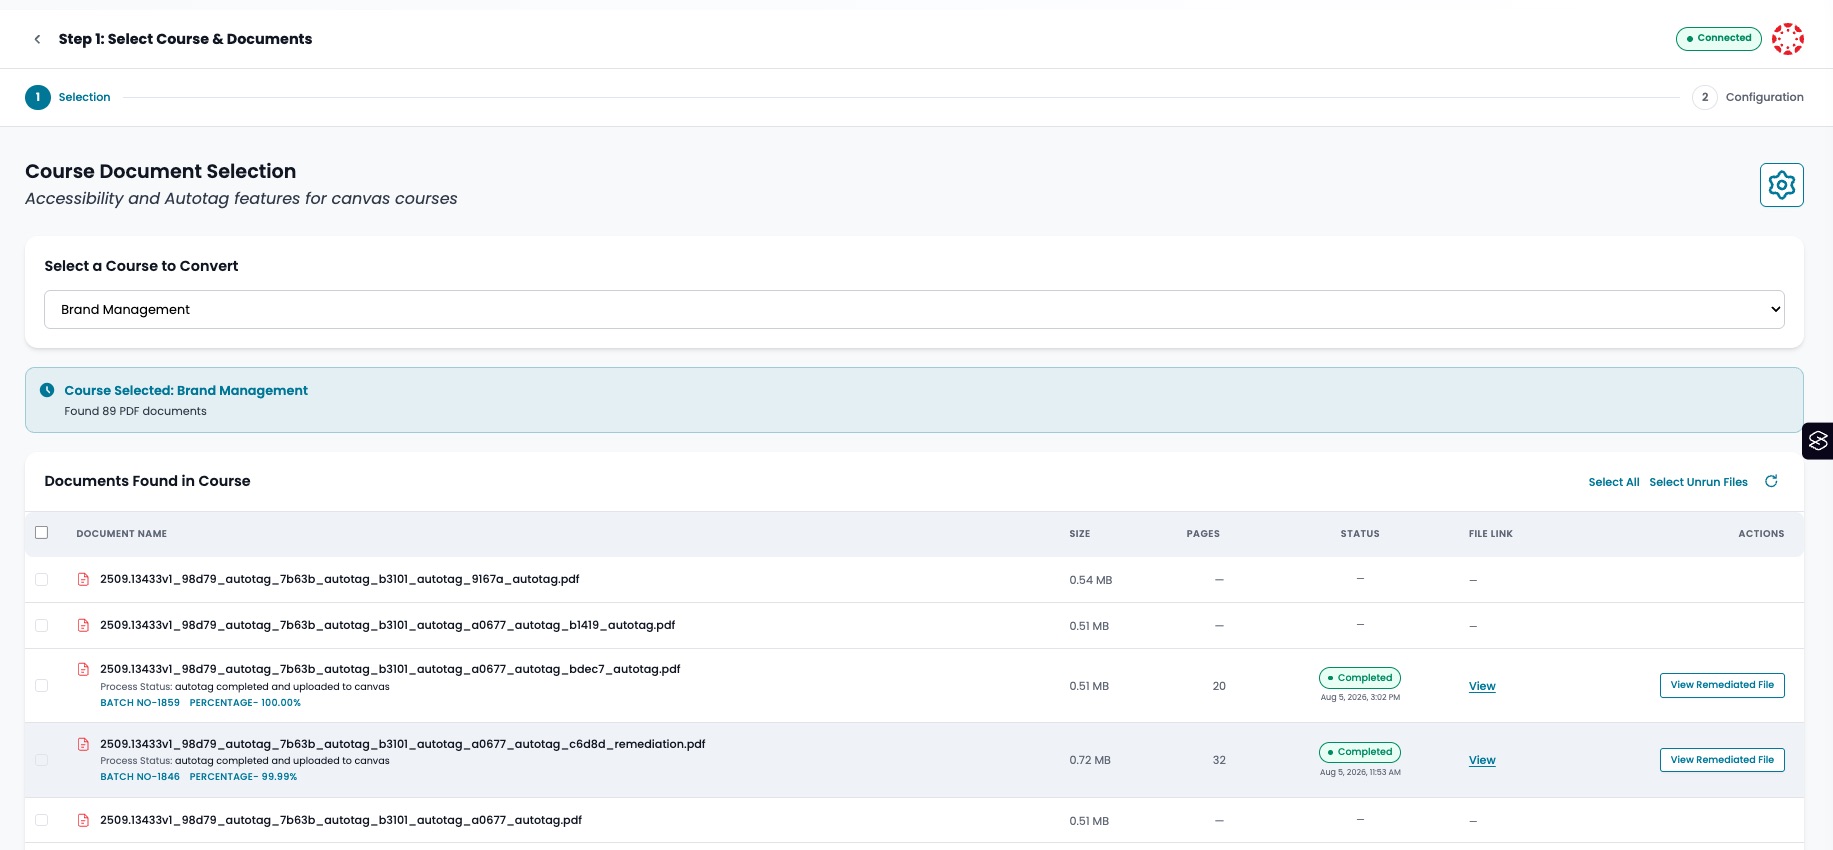
Select Unrun Files is the one you want when working down a backlog. You can select several courses at once — added in v3.0.0 — instead of working through them one at a time.
Choose whether to overwrite the original
Below the document list sits Replace original file, off by default.
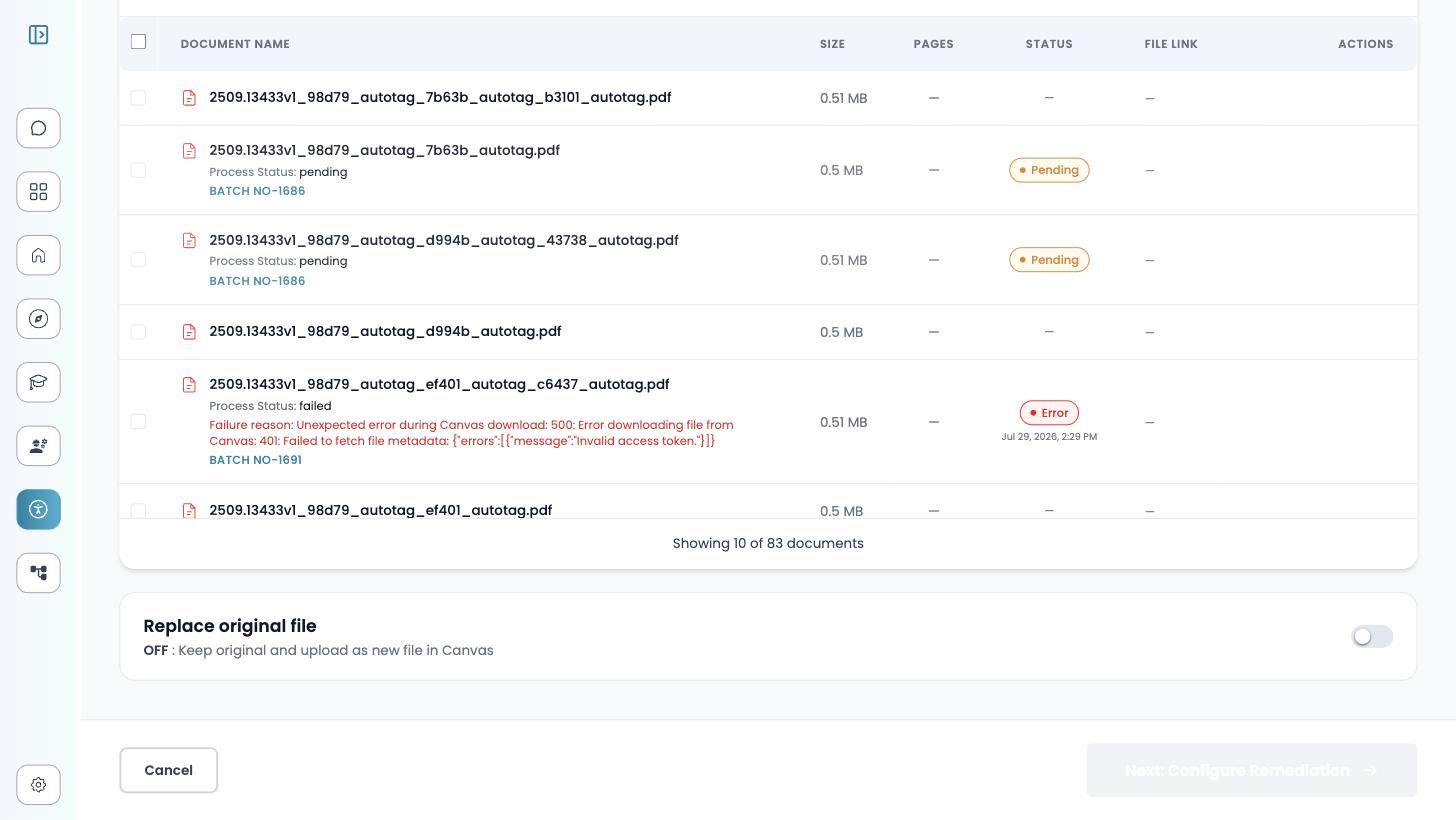
| Toggle | What lands in the LMS |
|---|---|
| Off (default) | The corrected file is added as a new file. The original stays. |
| On | The original is overwritten. |
This is decided here, before the run. There is no after-the-fact choice.
Choose Next: Configure Remediation to carry on to the strategy and settings, which are the same for every source — see Upload & remediate.
Connector permissions
Settings → Connectors carries two tenant-wide toggles, Actions (action execution) and Triggers (event triggers), both on by default. Changes take effect after saving, and turning one off turns it off for everyone in the institution.