Quickstart
Remediate your first PDF end to end, from upload to download.
Before you begin
- A CampusMind account with access to Accessibility. If you don't have one, ask an admin to invite you.
- One PDF. A short, real document works best for a first run — CampusMind accepts PDF only.
You don't need an LMS connection for this. Uploading a file directly is the quickest way to see the whole flow. Expect single-digit minutes per document, longer for large/complex scans.
Step 1 — Open the Document Accessibility Hub
Sign in and choose Accessibility in the left sidebar. The Document Accessibility Hub lists every remediation run as a batch — one uploaded file, a set of files, or a whole course.
Two actions start work, both in the top right: Start Upload, and Make Course Accessible in the "Process Course Documents" panel.
Step 2 — Upload a PDF
Choose Start Upload. Drop your PDF onto the panel, or choose Browse Files.
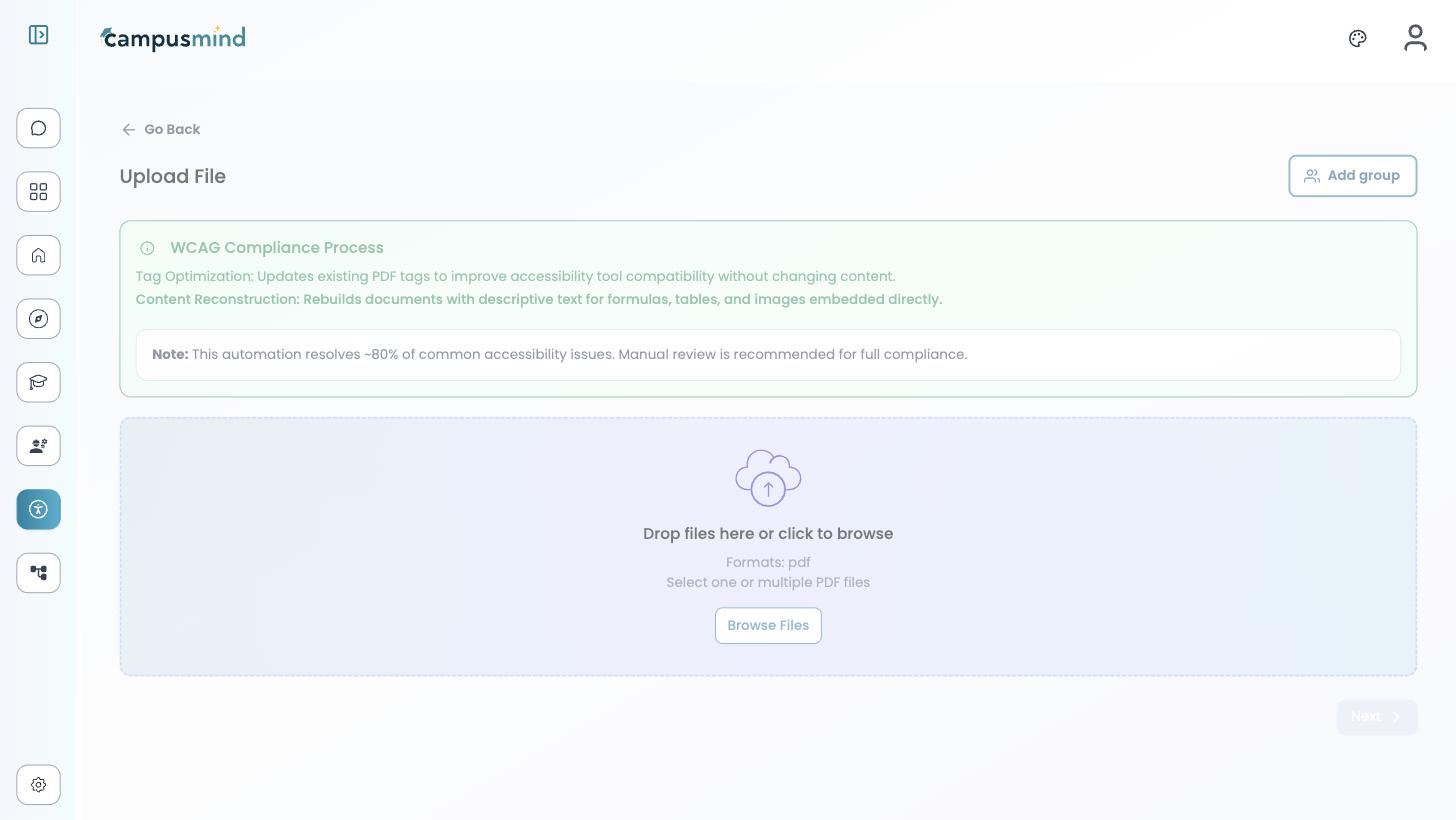
Add group shares the batch with a group so colleagues can work on the result. Skip it for a first run. Choose Next when your file is listed.
Step 3 — Choose a remediation strategy
This choice matters more than any other setting.
| Strategy | Best for | What it does |
|---|---|---|
| Preserve Layout (Auto-Tag Only) | Print-ready or well-formatted documents whose layout must not change | Adds tags and reading order, leaves the page design untouched |
| Full Accessibility Reconstruction (recommended) | Scanned documents, textbooks, lecture notes, complex academic content | Adds tags and rebuilds structure — headings, captions, table layout, contrast |
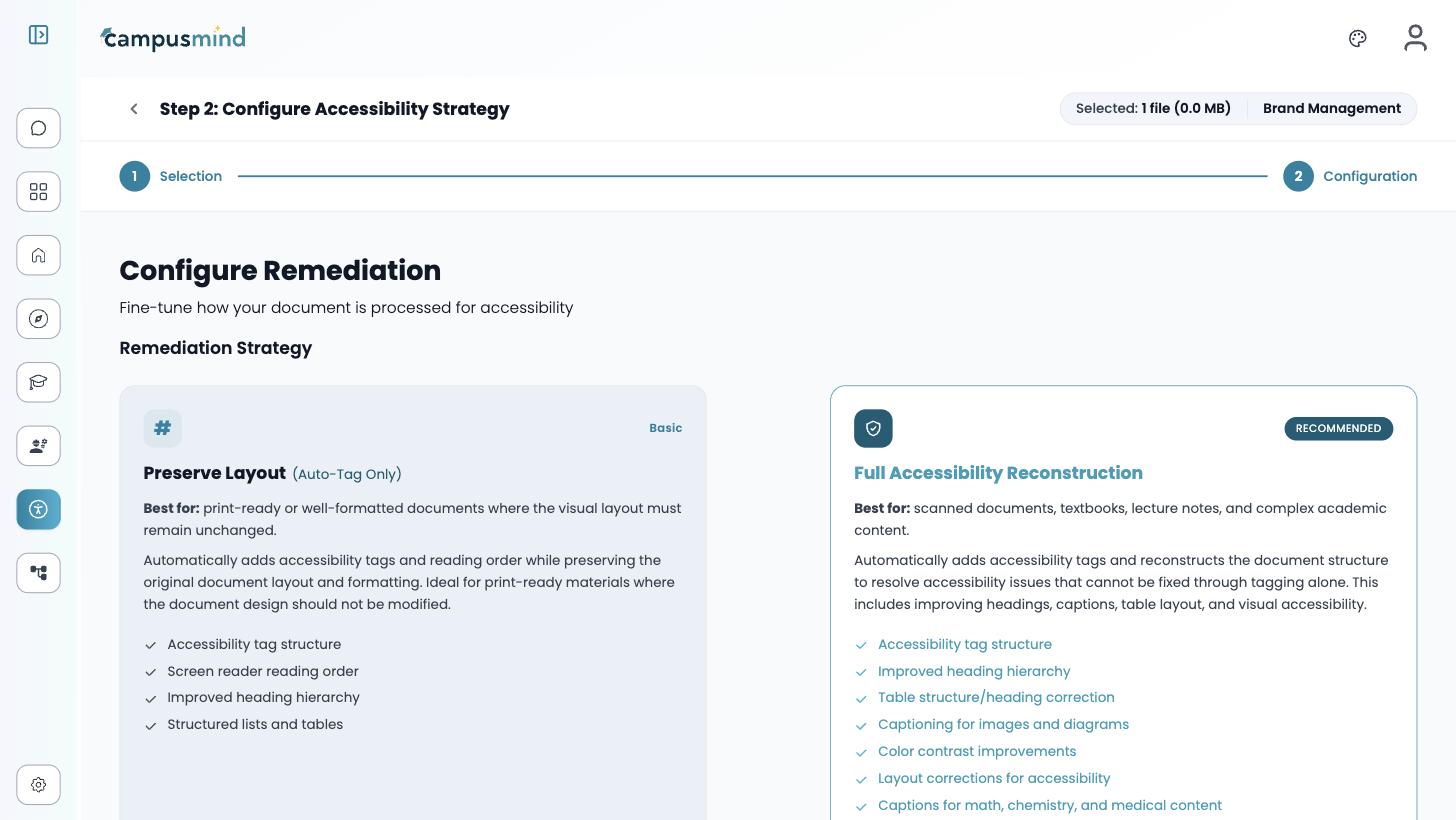
Full Accessibility Reconstruction opens an Advanced Settings panel below the cards. It's on by default and its defaults are sensible, so leave it alone for now — Upload & remediate covers every setting on this screen.
Choose Run Accessibility Remediation. The footer shows a processing estimate first.
Step 4 — Watch it run
Your batch appears at the top of the hub and moves through Pending and In Progress to Completed, with the progress bar filling as files finish.
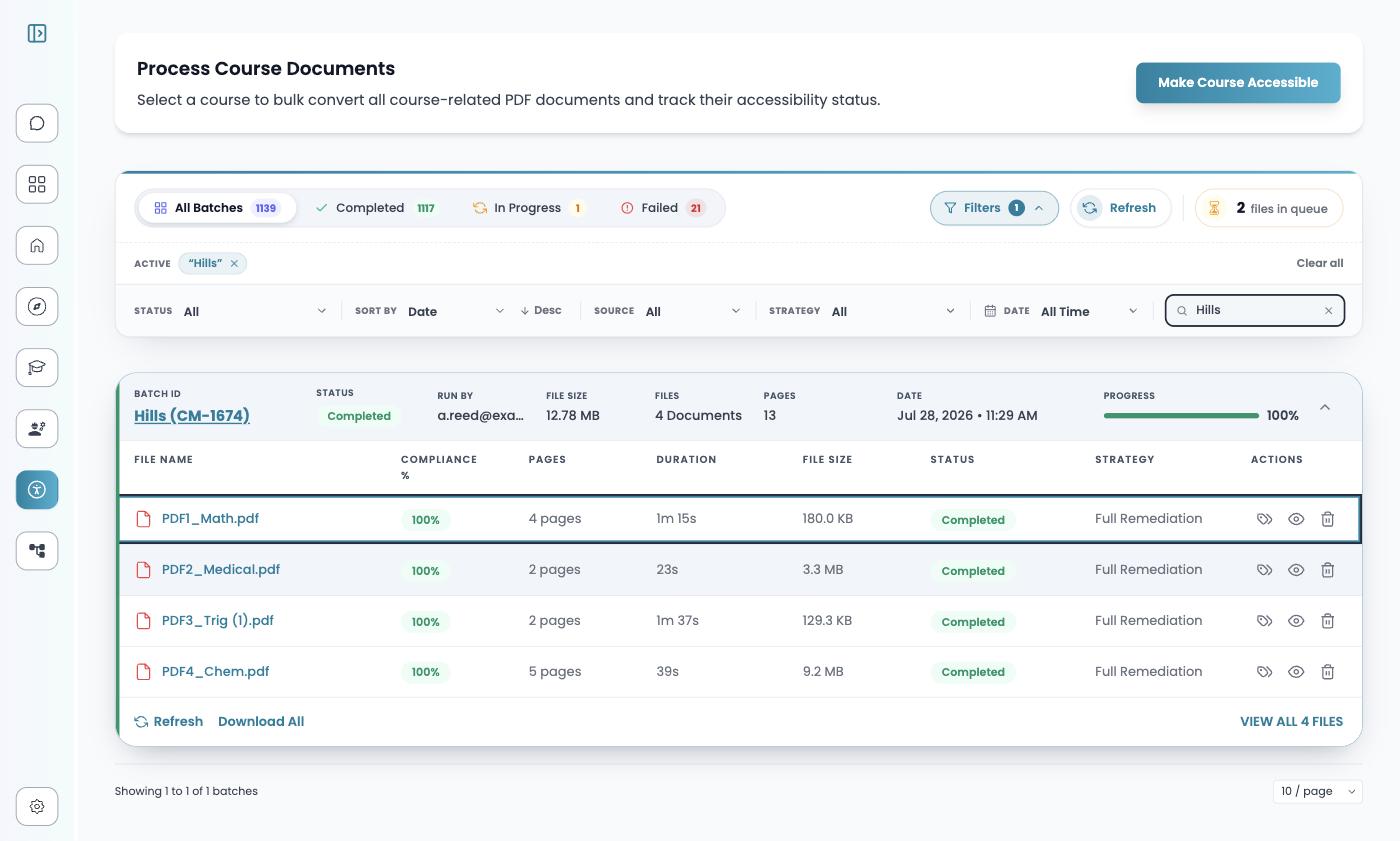
Select the chevron at the right of the batch row to expand it and see each file's compliance score, page count, duration, and strategy.
Step 5 — Check the result
Select the eye icon (View file details) on a completed file. This is where you find out whether the remediation actually worked.
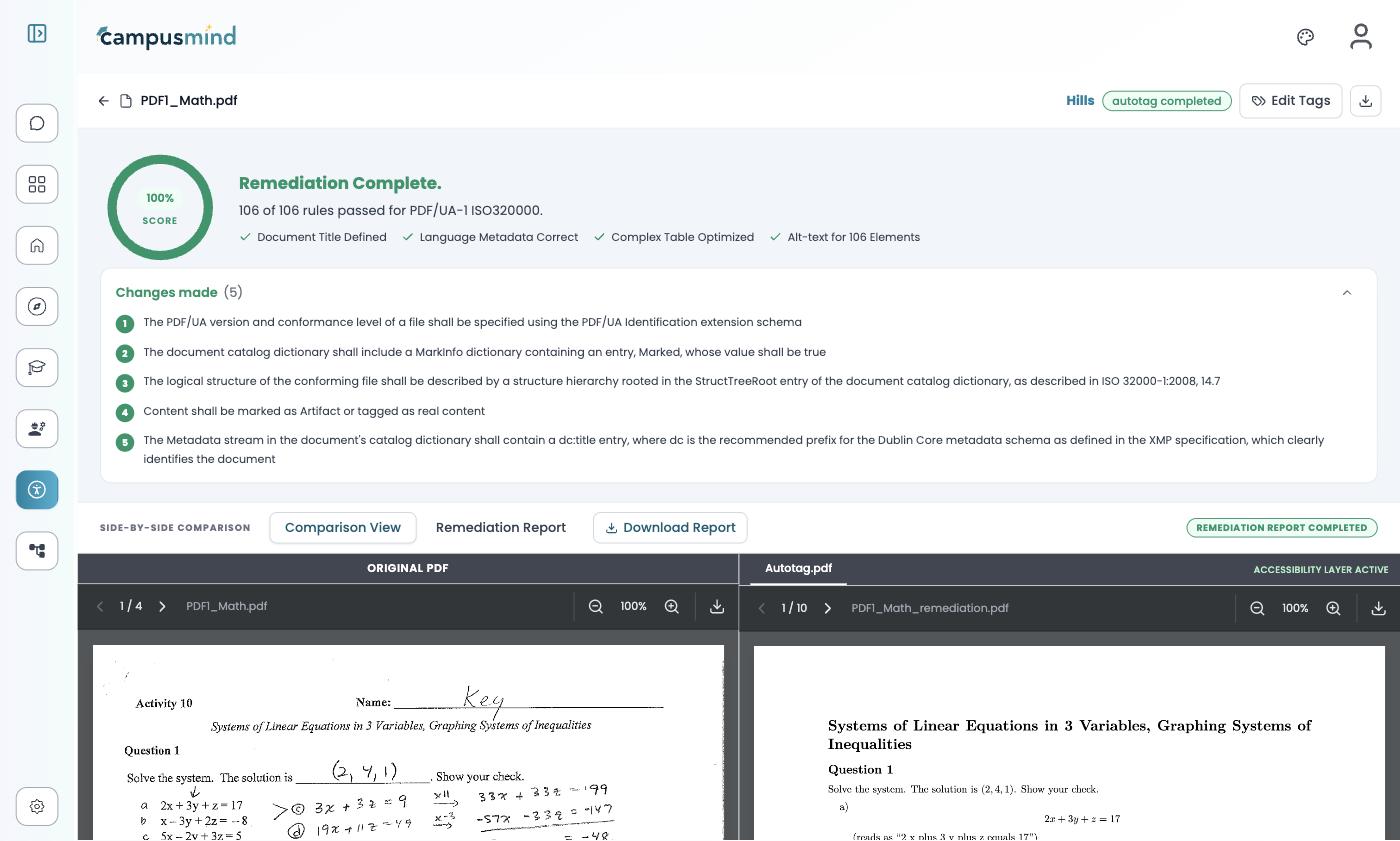
- The score ring — the share of the 106 PDF/UA-1 rules that pass.
- The comparison view — original left, remediated right. Check the page still looks right.
- The remediation report — the Remediation Report tab breaks results down by category and lists what remains.
Step 6 — Fix anything that needs a human
If the report flags something as Review required, choose Edit Tags to open the Tag & Caption Editor. Every tag is listed on the right; the pencil icon opens one for editing, where you can change its type or rewrite alt text.
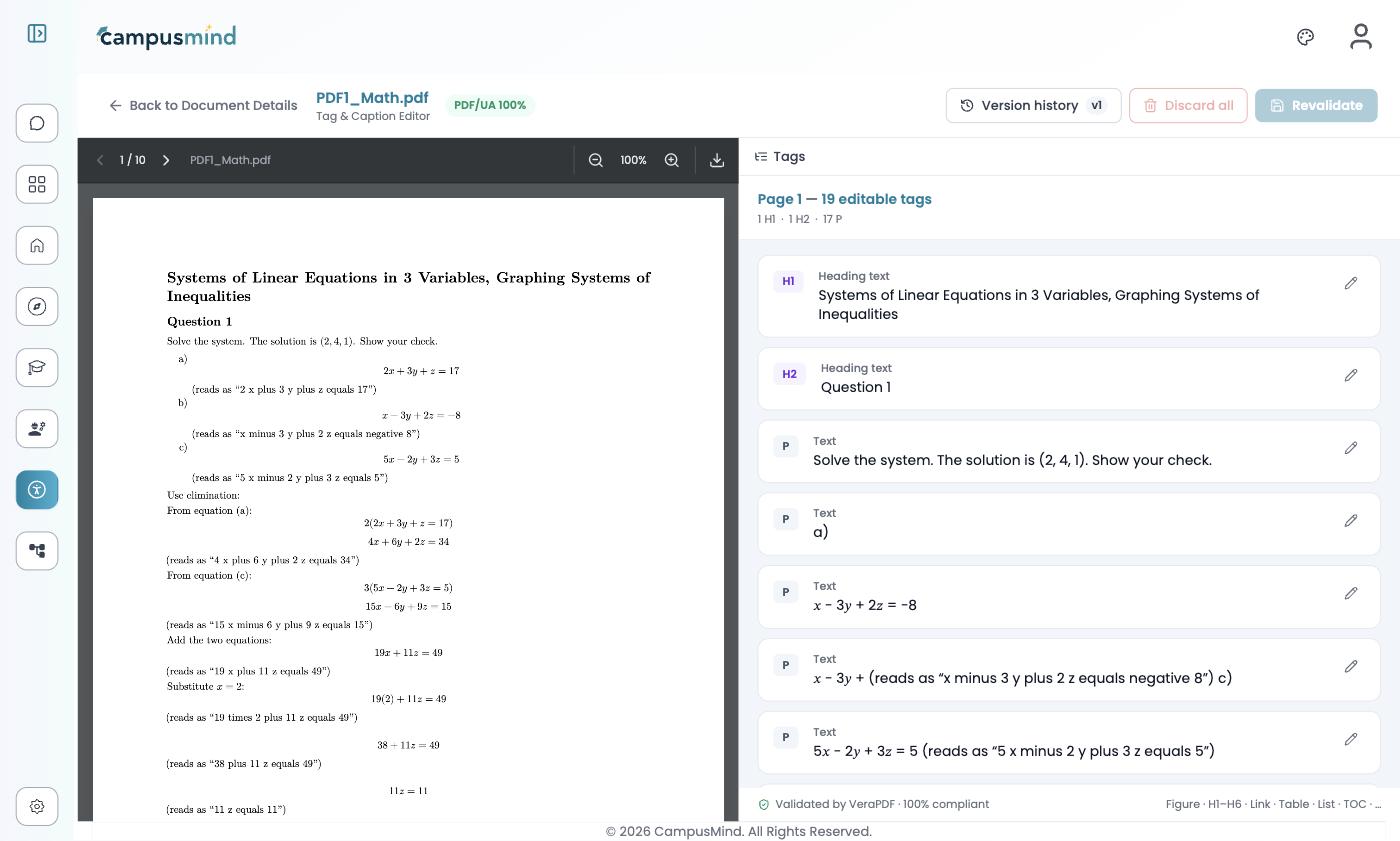
See Tag & caption editor.
Step 7 — Download the corrected file
Use the download icon in the top right of the document details page, or Download All on an expanded batch to get every file at once. The output is the corrected PDF — that's the whole loop.
Next steps
- How CampusMind works — the pipeline behind what you just did.
- Connect a source — do this for a whole course instead of one file.
- Trust & compliance — the standards behind the work.